Mushroom-Shaped Chocolate-Orange Meringues

Whimsical party food to impress.

Froot Loop Cupcakes (USA)

Fancy dressing up your vanilla cupcakes?

Creamy Chicken Tetrazzini

Savory and creamy comfort food!

I-Disgust-Me BBQ Burgers

A burger for when you've stopped caring about fat content. The only thing missing is bacon!

Crab-Topped Deviled Eggs

Eggcelent. Yeah, I went there.

Chicken-Fried Chicken with Country Gravy Dipping Sauce

Double-coated for extra CRUNCH.

Red-Bottom Cake

Imagine if a black-bottom cupcake had a baby with a red velvet cake. Now imagine a red-bottom cake. Simply another excuse to eat cream cheese frosting.

A Rather Traditional Pavlova

Dreaming of a sunny summer day in food format?

Orange Beef Burgers

A chinese takeaway in burger form.

Mexican-Inspired: Cheesy Refried Bean Quesadillas

I beat Taco Bell to their own crushed-Dorito food hell with these babies.

Marsala Chicken Dumplings

Dumplings get a makeover.

Mochacinno Fudge

Premium coffee drink fudge!

Parmesan Chicken Risotto

Risotto for picky eaters!

Whimsical Cookery is a site for adults who prefer to eat like children, or perhaps just need to cook for some children. This site contains an aversion to vegetables, a love of fried food and cupcakes, lazy shortcuts, some disturbing creations, and an ignorance of proper culinary practices...

Wednesday, 22 October 2014

Peanut Butter Silk and Fudge Pie


There are two ways of making this diner favorite, an express way, and from scratch.  To make the crust from scratch, simply crush oreos (or the chocolate biscuit part of the oreo) until you have 1 1/4 cup, combine with a spot of melted butter and press into the base of your pan.  This is baked for about 5 minutes at 350F/175C.
The second bit that can be made from scratch is the chocolate fudge.  Chocolate fudge is not difficult to make, you simply melt 1/2 tin condensed milk (that is 400g or about 14 oz) and 175g dark chocolate (about 1 cup dark chocolate chips).

This pie can really be an amazing thing to whip together in no time with pre-made ingredients or you can take the time to lovingly prepare it yourself!

You will need:
1 9-inch chocolate pie crust base (either prepared or store-bought)
3/4 cup dark chocolate fudge (either prepared or store-bought)
225g (8oz) full fat cream cheese
1 cup smooth peanut butter
1 cup granulated sugar
1 Tbsp butter or margarine
1 tsp vanilla extract
3/4 cup heavy whipping cream, whipped (OR 1 1/2 cup Cool Whip)
1 cup mini reeses peanut butter cups (dark or milk chocolate to taste)

IMPORTANT NOTE: Reduce sugar to 2/3 cup if using Cool Whip, as it is sweetened.

Yield: 1 9-inch pie

1. In a large bowl, combine cream cheese, peanut butter, sugar, butter, and vanilla using an electric whisk/mixer.

2. Gently fold the whipped cream into the peanut butter mix.  Set aside.

3. Warm your fudge slightly so that it is spreadable, and spread over your chocolate pie crust.

4. Pour your prepared peanut butter mix over the fudge.

5. Chop up reeses peanut butter cups and top pie.  Decorate with whipped cream if desired.


Monday, 13 October 2014

Pumpkin Spice Latte


Yes, it's that time of year when everyone tries to figure out what is in Starbuck's pumpkin spice latte and debate about whether there is real pumpkin in it (there is not, but what is 100% honest and natural these days anyways?).  If you don't have £4 to drop on one, why not make your own?

Pumpkin hint for Londoners: Libby's tinned pumpkin can be found at Whole Foods if you are struggling to find it in your local supermarket.  I've only ever found it at Whole Foods after being tipped off by other american expats.  They also sell organic pumpkin, which is more watery, but fine for a drinks recipe.

You will need:
2 cups milk
1/2 cup prepared hot strong coffee
2 Tbsp tinned pumpkin puree
1 Tbsp vanilla extract (imitation/vanilla 'flavour' is fine)
3 Tbsp sugar
1/8 tsp ground cloves
1/8 tsp ground nutmeg
1/8 tsp ground ginger
1/2 tsp ground cinnamon
Whipped cream topping optional!

Yield: 2

1. In a saucepan, combine pumpkin, cloves, nutmeg, ginger, and cinnamon.  Stir on medium heat until bubbling and heated through.

2. Add the milk, vanilla, and sugar.  Stir until heated thoroughly and simmering slightly.  Increase heat if necessary, but stir constantly to avoid scalding the milk.

3. Remove from heat and add coffee to taste. I've given 1/2 cup as a guide.

4. OPTIONAL STEP: Pour into cups through tea strainer to remove any larger pumpkin fibers.

Serve with whipped cream and sprinkle with nutmeg for presentation points!  Enjoy!


Thursday, 2 October 2014

Turkey Salisbury Steak


A perfect, quick, and healthy version of a childhood comfort food!

You will need:
300g (3/4 lb) Turkey Breast Mince
1 small egg
1 tsp Worcestershire sauce
1/2 cup dried bread crumbs
1/4 tsp pepper
1/2 tsp salt
1/2 tsp onion powder
1/4 tsp garlic powder
---
1 1/2 Tbsp all purpose flour
1/2 tsp pepper1/2 cup skimmed milk
1 cup hot water
2 beef oxo (bouillon) cubes
1 1/2 Tbsp vegetable oil
225g (about 9 oz) white mushrooms

Note: Recipe assumes the gravy is started as soon as the 'steaks' hit the frying pan.

1. In a medium bowl, combine bread crumbs, pepper, salt, onion powder, and garlic powder.  Mix.

2. Add turkey mince, Worcestershire sauce, and egg to bowl.  Combine as though you were making hamburgers and shape into 4 oblong-shaped patties.

3. In a greased frying pan, cook patties until browned on each side on a medium heat.  Ensure that patties are fully-cooked (this can be done by keeping pan covered during browning).  Remove from heat and keep covered/warm.

4. For the gravy, start by chopping up and frying the mushrooms in a bit of oil.  Set aside.

5. In a saucepan, add flour and pepper.  Whisk in oil.  Heat until bubbling.

6. Dissolve oxo cubes in water and add to saucepan.  Whisk and add milk.

7. Once combined, return mushrooms to saucepan and continue to heat until bubbling and thickened.

8. Serve steaks smothered in gravy!  Lovely with potatoes and veg.

Thursday, 18 September 2014

Personal Deep-Dish Pizzas


I broke out my mini springform pan again, this time for a savory recipe!  Personal Deep-Dish Pizzas!

As it is a pizza, you can put any fillings you want in it.  What follows are some filling suggestions and then a general recipe.

Filling suggestions:
Chicken + Crispy Bacon + BBQ Sauce + Mozzarella
Fresh Basil + Fresh Tomatoes + Tomato Sauce +  Pepperoni + Mozzarella + Parmesan Shavings (top)
Pepperoni + Spicy Sausage + Tomato Sauce + Mozzarella
Chorizo Sausage + Peppers + Tomato Sauce + Mozzarella

You will need:
1 packet quick rise-dry yeast
1 cup water
2 Tbsp olive oil
1/2 Tbsp sugar
1 tsp crushed sea salt
2 1/2 cups flour

Yield: 2 6-inch deep dish pizzas


1. Combine dry ingredients: salt, sugar, flour, and yeast in a medium bowl.

2. Heat water to 130 F, immediately add water (once heated) and olive oil.  Stir until thick.

3. Turn dough onto floured surface, kneading for 5 minutes.

4. Return dough to bowl and cover with kitchen towel, let sit for 5 minutes.  Now is a good time to very lightly grease your springform (or deepdish) pan.

5. Cut dough in half, and roll out.  Keep in mind it will rise to nearly twice its height.

6. Lay dough over pan and press in, as though you were placing a pie crust.  Press into sides if necessary.

7. Use fork to poke holes in dough, then cover with a kitchen towel and let rest for 15 minutes.  Preheat oven to 400 F/200C.

10. Bake on a flat baking tray at 400 F/200C for 10 minutes.  Be sure to have toppings ready.

11. Remove pizza crusts from oven, and fill your pizza(s).

12. Replace in oven, generally 10 minutes, or until cheese has melted or slightly browned. You can check the middle is heated by quickly stabbing through the fillings with a small knife. When you pull the knife out, check the temperature of the metal.  If cooking with raw meat, a food thermometer may be necessary.


Friday, 5 September 2014

Disgustingly Delicious: Pt. 2


Okay, so there is a part 2. Because I have no self control.

I've actually seen comedians mocking this on multiple TV shows. The Buffalo Crunch Donut by Tim Horton's is described as yeast-based doughnut drenched in buffalo-style chicken wing sauce and covered in kettle chips. There is also a lovely pool of buffalo sauce in the middle with two lonely tortilla chips floating around. I have to respect what they were going for, but I really can't imagine this actually tasting good...


 Oh Taco Bell, I have been putting Doritos in my tex mex for years.... Late to the party with this one.


Another disgustingly delicious food item I've actually tried. Yeah. I ate that. It happened. Damn you Pizza Hut!

I almost caved in and got The Cheesecake Factory's fried mac n cheese balls the last time I was in America, but perhaps, wisely, thought better of it. I mean, you can't eat that for lunch AND get cheesecake for dessert. Right? (photo from chubbyheart.com)

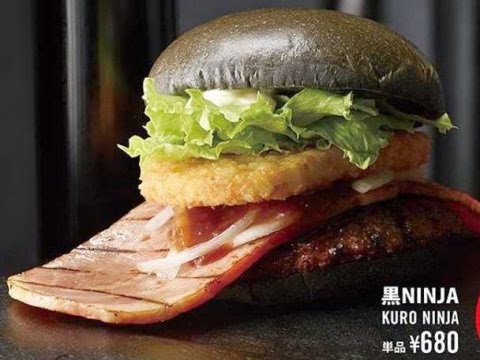
It would, of course, be a mistake not to go abroad in my search of disgustingly delicious food. This burger(?!) from Burger King in Japan fits the bill. Dubbed the 'Ninja Burger', its bun is made black with bamboo charcoal and inside is a burger, a hash brown, an oddly-shaped piece of bacon, lettuce, and a special sauce. I would love to get my hands on this!

Sunday, 31 August 2014

Disgustingly Delicious

Five foods that look simultaneously disgusting and delicious

The Krispy Kream Burger of delicious doom


I would love to land on this plate of Denny's cuisine, face first.  But of course, shouldn't. Is this still being sold?!


KFC's double down sandwich, is probably too much chicken for me.  I NEED CARBS.


foodbeast.com
I take my hat off to the inventors of the Fat Darrell sandwich (which includes chicken strips, mozzarella sticks, fries, topped with marinara sauce, lettuce, and tomatoes), as I always saw putting all my favorite foods into one bun/bowl/etc as one of my unique cooking qualities.  Not so unique :(


NYC's Cer Te sold this Thanksgiving Pizza duing the festive season (which included turkey meatballs, mashed potatoes and gravy, cranberries and butternut squash, topped with mozzarella). In similar news, I had heard Tesco was selling a Christmas pizza, but was unable to check it out, personally.

This list could probably go on for years, so I've forced myself to stop at 5. Must. Stop. Googling.

Thursday, 21 August 2014

Oreo Cheesecake (US/UK)


Cheesecake #2!  Since these cookies n cream cupcakes were so tasty, I thought I'd work out a recipe for a similar cheesecake.  Enjoy!

You will need:
140g (just under 5oz.) Oreos or similar chocolate and cream sandwich biscuits
150g (just over 5oz.) Chocolate biscuits, preferably Oreos with the cream removed
3 Tbsp melted butter
350g (~12oz) full fat cream cheese
200g (~1 cup) granulated sugar
3 eggs
100ml (just under 1/2 cup (.42)) soured cream
1/2 Tbsp flour
2 1/2 tsp vanilla extract

You will also need a 6-inch springform pan.

1. Crush 150g chocolate biscuits to a fine sandy texture.  This is best done either in a food processor or in a strong food storage bag with a rolling pin.

2. With your hands, mix crushed biscuits and 3 Tbsp melted butter in the springform pan.  Press around edges to form crust.

3. Crush 140g sandwich biscuits into large pieces.  Set aside.

4. In a large bowl, cream together the sugar and cream cheese. 

5. Mix in eggs.

6. Mix in flour, soured cream, and vanilla.

7. Once smooth, stir in oreo pieces with a large spoon.  Set aside a few tablespoons for a topping after baking.

8. Pour into crust.

9. Bake for 45 minutes (or until set) at 175 C (250 F).

10.  Allow to cool before topping with remaining oreos and placing in the fridge to chill for 5-6 hours.  

Sunday, 20 July 2014

Spicy Blended Green Vegetable Soup


I've been at it again, trying to invent reasonably healthy recipes that actually taste good.  My husband agrees, I have hit the nail on the head with my spicy blended green veggie soup!  This soup uses potato and veggies as thickener instead of a roux or cream. Health! Great recipe for picky eaters as well, no bits if you leave off the garnishes that do not suit your tastes.

You will need:
1 small potato
1 clove garlic
1 1/2 spring onion
2 large stalks celery
1 cup broccoli
1/4-1/2 tsp minced green chili (depending on spice preference)
2 1/2 cups water
2 chicken stock cubes (or vegetable stock for veggies)
1 1/2 Tbsp smooth peanut butter
1/4 tsp red chili flakes (for garnish)
1 Tbsp olive oil or cooking spray

Yield: 2 large servings

1. Wash and peel potato, chop into chunks and set aside.

2. Slice one clove of garlic and set aside.

3. Wash spring onion, celery, broccoli, and chili.

4. Slice celery, spring onion, and broccoli into large segments, set aside.  If you'd like spring onions as part of a garnish for the soup, thinly slice a couple of the segments and set aside from the rest of the vegetables.

5. Mince or cut green chilies into sliver-thin strips.  Set aside any you would like to use as garnish.

6. In a medium pan, heat oil and fry garlic and celery until fragrant.

7. Add water, potato pieces, spring onions, broccoli, green chili, and peanut butter.

8. Boil, covered, for 10 minutes or until vegetables are tender.

9. After 10 minutes, remove some of the soup water (about 1/2 a cup is fine) and dissolve the chicken stock cubes before returning the soup/stock mix to the pan.  Stir and remove from heat.

10. Add soup to blender (or use hand blender) to blend soup smooth.

11. Serve hot.  Garnish with spring onions, chili slivers, and red pepper flakes to taste.

Monday, 7 July 2014

Thursday, 26 June 2014

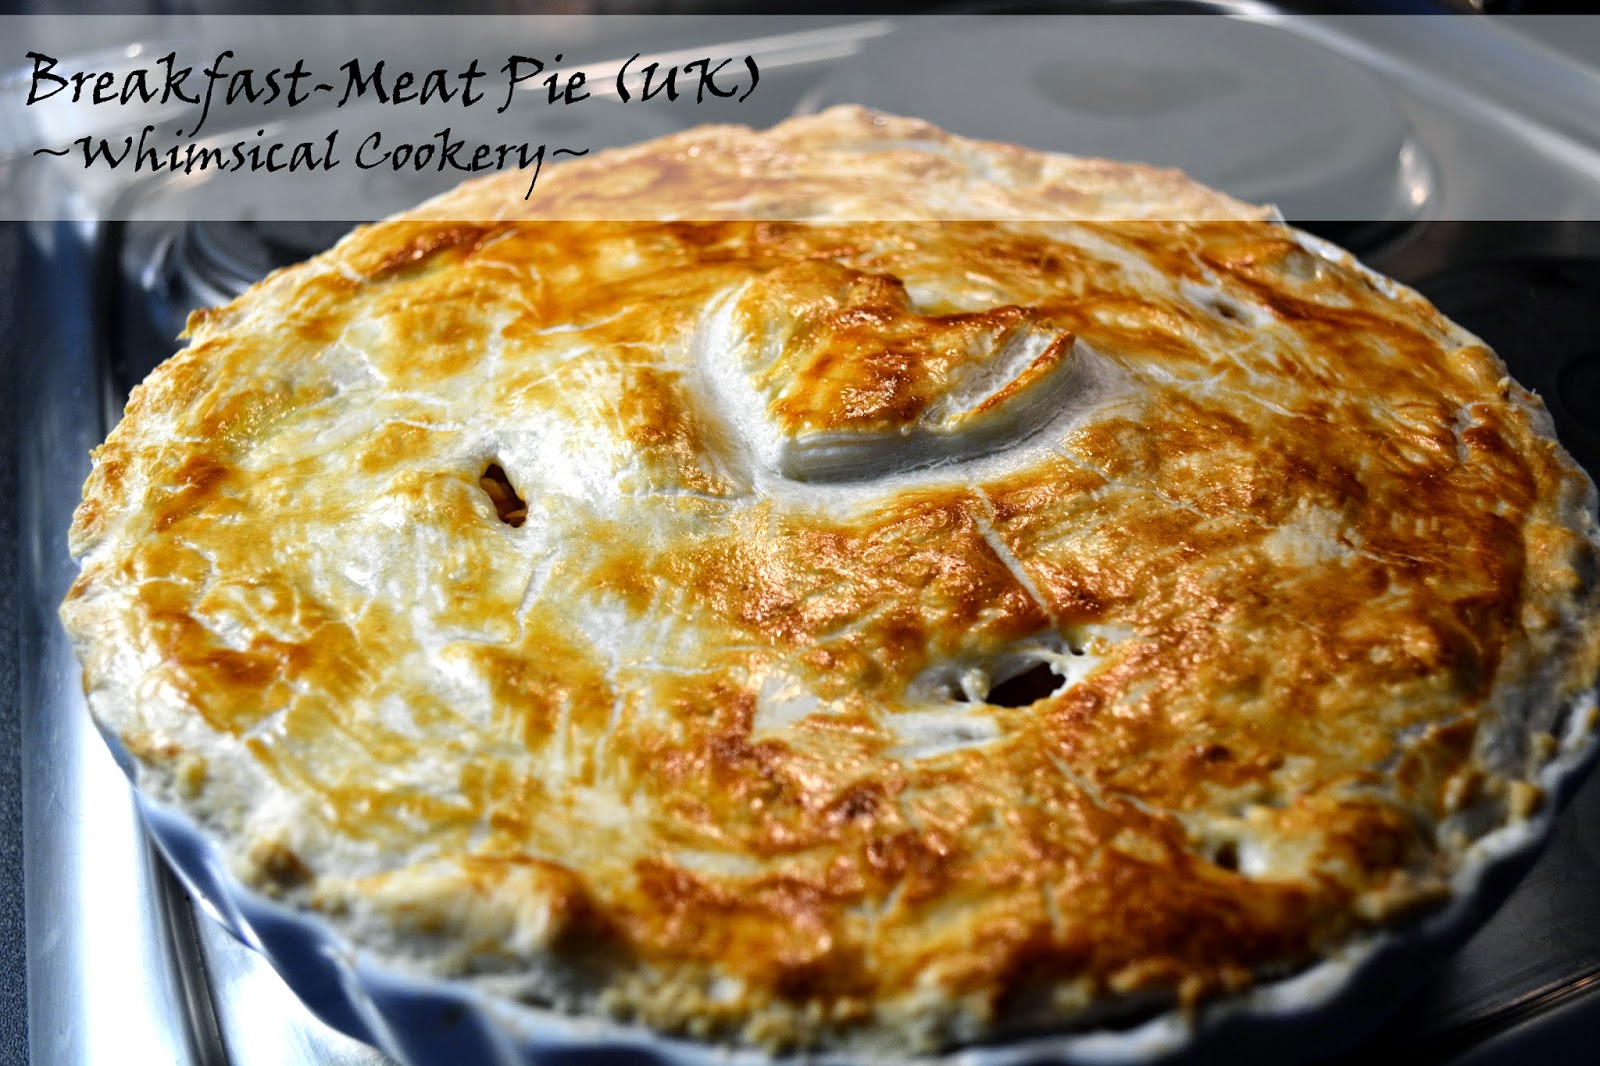
Breakfast Pie (UK)


I suspect this recipe was born out of some bizarre twist on how americans interpret english cookery and pies.  Perhaps it is not a meat pie in the classical sense, but hey, it's got meat... and it's in a pie... Dig in!

You will need:
75g crispy bacon (cooked)
250g trimmed smoked back bacon (cooked)
450g Irish sausages (I used 8 thick Richmond sausages)
250g white mushrooms (sliced and pan-fried)
1 tin (415g) Heinz baked beans
375g Ready-rolled puff pastry
1 egg

Yield: 10-inch pie

1. The first step is to pan fry the mushrooms, cook the crispy bacon, back bacon, and sausages according to package instructions.

2. Once semi-cooled, crumble the crispy bacon into large pieces, rip or cut the back bacon into pieces, and slice your sausages into bitesize pieces.  Set aside.

3. Roll out your puff pastry so that you can adequately cover the inside (bottom) of your pie as well as make a lid for your pie.  Line the base of your pie tin and bake at 180C for 5-10 minutes until the pastry puffs up and begins to brown ever-so-slightly.

4. Immediately add the back bacon, then sausage pieces, then spread the beans over.  Next add the mushrooms and finish with the crispy bacon on top.  Drape the puff pastry pie lid over and trim away any excess.  If you are skilled with a knife, you can quickly add a shape or decoration using your trimmings.

5. In a small bowl, crack and whisk your egg.  Brush the pastry lid of your pie with an eggwash.

6. Replace in the oven and cook for 25-30 minutes at 180C.

7. Allow to cool for 5 minutes before serving.


Wednesday, 28 May 2014

Three English Cheeses Homemade Mac N Cheese


This Mac N Cheese has become a quick favorite in our household.  It is just a matter of finding the time to grate all of the necessary cheese!

You will need:

1 1/3 cup evaporated milk
1/2 cup milk
2 Tbsp margarine
1/4 tsp ground black pepper
1 1/4 tsp salt
1 1/2 tsp course grain french mustard
3 Tbsp cornflour (cornstarch)
200g Double Gloucester cheese (just over 2 cups)
100g Red Leicester (just over 1 cup)
200g Mature Somerset White Cheddar (just over 2 cups)
3/4 cup water
2 1/4 cup mini shell noodles


1. Cook noodles according to package directions, set aside if finished before you finish the cheese sauce part of this recipe.

2. Grate cheese and set aside 1/2 cup made up of all three cheeses.

3. In a saucepan, add water and dissolve cornstarch.  Add salt, pepper, mustard, evaporated milk, milk, and butter.  Stir constantly over a medium heat until sauce boils, letting it boil for about a minute.

4. Immediately stir in cheeses, allowing them to melt.  Top with remaining 1/2 cup.

5. Add cooked noodles to mixture.

6. Grease casserole dish and pour in macaroni and cheese.

7. Bake at 350F/180C for approx 20-25 minutes, less in fan-assisted ovens.

Friday, 16 May 2014

Camembert and Cranberry Relish-Topped Turkey Burgers


A classic combination!

You will need:
1 small/medium egg
4 Tbsp breadcrumbs
1 tsp onion powder
1/2 tsp pepper
1/2 tsp salt1.5lbs/380g turkey breast mince
6 Tbsp cranberry relish (high quality if possible)
~9oz./250g Camembert cheese
4 buns or Ciabatta rolls

Yield: Approx 4 large burgers

1. Combine 1 egg, breadcrumbs, onion power, pepper, salt, with the turkey mince.

2. Divide mixture by 4 and roll each into a ball before pressing flat to desired width.

3. Fry burgers on a medium heat in a covered frying pan, flipping occasionally.

4. While burgers cook, remove the rind from the Camembert and cut into 4 equal slices.

5. Once burgers begin to brown, top each with a piece of Camembert and cover pan with a lid allowing the steam to melt the cheese.  Reduce heat (or turn it off completely, depending on how cooked your burgers are at this stage).

6. Serve on a toasted bun topped with the cranberry relish.

Thursday, 24 April 2014

Cookie Dough Cheesecake (UK)


Yesss I have finally perfected a home recipe for the amazing cookie dough cheesecake that I had on holiday at The Cheesecake Factory.  While it's not going to put them out of business anytime soon, this recipe is a fairly straightforward with little chance of failure.

Please note, this recipe is for a 6 inch/15cm tin, double the recipe for a full size cheesecake and adjust your cooking times.

You will need:

Cheesecake Crust:
200g malt biscuits
2 1/2 Tbsp melted butter

Cookie dough filling:
2 Tbsp butter (room temperature)
3 Tbsp granulated sugar
2 Tbsp brown sugar
1 tsp vanilla extract
1 1/2 Tbsp water
1/4 cup flour
1/2 cup dark chocolate chips/drops

Cheesecake filling:
1/2 cup sugar
300g cream cheese (full fat)
1 cup soured cream
2 small eggs
1 tsp vanilla extract

1. Preheat oven to 100C.

2. Crush the malt biscuits and combine in a bowl with melted butter.

3. Press mixture into base of springform pan and bake for 5 minutes or until slightly golden.  Set aside.

4. Next, prepare the cookie dough filling by combining butter, granulated sugar, brown sugar, and vanilla using an electric mixer until smooth.  Mix in flour until combined. 

5. Stir chocolate chips into cookie dough and then set aside.

6. For the cheesecake filling, you first need to mix (with an electric mixer) the granulated sugar and cream cheese.  Once smooth, add the soured cream, eggs, and vanilla.  Mix.

7. Bring oven temperature up to 175C while you assemble your cheesecake.

8. Assemble cheesecake by pouring the cheesecake filling into the prepared crust. 

9. Drop round portions in a circle around the cheesecake.  Press to submerge dough if it does not sink, as it will start cooking if it is peaking out.

10. Bake cheesecake at 175C for 30-40 minutes.

11. Allow to cool and then chill for 2-3 hours.  Sprinkle with chocolate chips for decorations if you wish.


Sunday, 13 April 2014

Peanut Butter Chocolate Chip Ice Cream (US/UK)


I've come up with an extremely successful peanut butter and chocolate chip ice cream recipe! This relatively simple ice cream recipe actually tastes more like gelato due to the added creaminess from the peanut butter, but I am hesitant to label it as that as I do not wish to incur ire from foodies.

For one batch that fits perfectly in a standard ice cream maker you will need:

1 cup whole milk
1 cup double cream (half and half)
2/3 cups granulated sugar
1 tsp vanilla extract
200g (7oz) smooth peanut butter
140g (5oz) dark chocolate (or semi-sweet) chocolate chips

Note: This recipe assumes that you have chilled your ice cream maker or are familiar with how to make freezer ice cream.

1. Combine whole milk, sugar, and vanilla extract in a pan over low heat.  Remove from heat as soon as smooth and set aside to cool.

2. Using an electric mixer, beat the double cream until it becomes aerated and starts to stiffen.

3. In a large bowl (that can easily be poured from), add the peanut butter and milk mixture.  Combine using an electric mixer until smooth.

4. Fold in the cream.

5. Add mixture to ice cream maker and allow to set.  Once the ice cream is semi-frozen, add the chocolate chips and allow them to be folded in.

6. Remove mixture from machine, store in a freezer-safe container, and freeze for at least 1 hour or until ice cream is the correct consistency.


Sunday, 6 April 2014

Tangy-Spicey Sriracha Fish Tacos


This recipe was inspired by the fish tacos I recently tried at Wahaca, and a bottle of Sriracha I managed to get my paws on. As a note, I would say that you can take the time to batter and fry your own fish, but I made these on a Tuesday, that wasn't happening.  So I took the easiest shortcut ever, chopping a battered fish fillet in half for each taco.  As long as you buy a reasonably good quality fish, it doesn't detract from this flavorful taco!

For 8 tacos, you will need:
4 large battered fish fillets (cooked and halved)
1/2 cup sour cream
1 cup shredded lettuce

Sriracha cream sauce ingredient

You will need:
1/2 cup mayonnaise (light is fine)
2 1/2 Tbsp condensed milk (again, light is fine)
1 3/4 Tbsp Sriracha sauce

Simply whisk all ingredients together and serve drizzle over fish.
Note: This sauce is incredibly addicting, and you will want to put it on everything.

1. Preheat oven to 100C/210F.

2. Assemble your tacos, lettuce, (cooked) fish, and drizzle sauce and sour cream over (this can be done by putting sauces in plastic bags and cutting off the corner, or use a diner-style squeezy bottle).  I decorated my tacos with 3 additional dots of Sriracha, but I'd avoid this if you don't like things too spicy.

3. Line up your tacos on a baking tray with the edges facing upwards.  They will start to crisp up after about 5 minutes, but keep an eye on them as I've noticed they jump from pale and limp to crisp in about 30 seconds!

Monday, 24 March 2014

American-Style Mint Chocolate Chip Buttermilk Pancakes


I saw pics of these pancakes on Pinterest and Buzzfeed and I just had to make my own!!!   They are so beautiful and taste just as good as they look.  I wished there was more people around to share them with when I was cooking!  I believe that they could benefit from using mint chocolate chips, but those are not easily available to me where I live in London.  But if you can get some, go for it!

You will need:
1 1/3 cup flour
2 Tbsp granulated sugar
1/4 tsp salt
1/2 tsp baking soda
1 tsp baking powder
1 cup buttermilk
1 large egg
2 Tbsp butter (melted, but not too hot to scramble the egg!)
2 tsp peppermint extract
1/2 teaspoon vanilla extract
1/2 cup milk (added a bit at a time until batter is correct consistency)
Green food coloring
3/4 cup mini dark chocolate chips OR mint chocolate chips
Whipping cream + 2 Tbsp granulated sugar, whipped! OR already prepared whipped cream)

Yield: 12 medium pancakes (that are very filling!)

1. In a large bowl, sift flour, sugar, salt, baking soda, and baking powder.

2. In a smaller bowl, whisk the buttermilk, egg, butter, peppermint, vanilla, and your green dye (amount to preference/quality of dye).

3. Slowly stir wet ingredients into the dry ingredients and add milk until batter is a reasonably runny consistency (but will still hold a bit of shape).

4. Mix in chocolate chips.

5. Heat a frying pan to medium and add some butter to ensure a non-stick surface.  Butter should sizzle, but not start smoking!

6. Drop batter into pan, spreading into circle if necessary.

7. Cook for a couple minutes until edges start bubbling, then flip and repeat!

8. Once all pancakes have been cooked, serve with whipped cream (or maybe ice cream?).  The pancakes really benefit from the dairy, I promise you.


Monday, 24 February 2014

Chicken and Chorizo Soft Tacos


This dish pulls from two different recipes, one for grilled chicken and another for chorizo tacos!  All of the flavors meld well together, and the chicken is perfectly seasoned and tasty on its own! The chorizo adds something special to this otherwise traditional tex mex style taco.

You will need:
2 lbs Skinless Chicken Tenderloins (tenders)
2 Tbsp olive oil
1 tsp salt
1/8 tsp ground pepper
1/4 tsp garlic powder
1/4 tsp onion powder
---
15 oz (425g) uncooked chorizo sausage
1 1/2 cup grated cheese
         (I used a mix of Monterey Jack, Cheddar, Queso Quesadilla and Asadero Cheese)
1 cup sour cream (low fat sub is fine)
15 small white corn tortillas (or flour tortillas if you prefer)

Yield 15 small tacos

1.The first step is to cook the chorizo sausage.  To do this, remove the casing from the sausage(s).  This is easily done by squeezing the meat from the casing directly into your frying pan.

2. Cook on a medium heat until the chorizo begins browning.  Drain excess grease and press with paper towel to remove any remaining grease.  Set aside for reheating right before serving.

3. The next step is the cook the chicken.  The best way to cook this chicken is on a grill or griddle (or George Foreman)  Preheat this if necessary.

4. Clean and trim the strips of chicken.  Set aside.

5. In a medium bowl, combine oil, salt, pepper, garlic powder, and onion powder.

6. Add strips of chicken to bowl and coat evenly.

7. Place on the grill/griddle at a medium-high heat.  Since grills and griddles vary, I am hesitant to suggest a set time.  Do ensure chicken is thoroughly cooked before serving.

8. Once all chicken is cooked, you will need to cut each tender into thin strips (see photo).  Now is a good time to reheat the chorizo if it has had a chance to cool down.

9. You can begin assembling the tacos by sliding the cut chicken on a spatula and placing it into the center of your shell.  Top with a spoonful of chorizo, cheese, and sour cream. 

Sunday, 16 February 2014

Eggless Wedding Cupcakes (UK)

Tajpal Dhamu Photography

Okay, so it took me several months to get this up here!  I got married last November in a beautiful ceremony in east London.  The day before the wedding, my mum, one of my bridesmaids, and I were all baking around 140 cupcakes in a style reminiscent of Cupcake Wars.  It was great fun and the guests seemed to enjoy the cakes!

Yield: 24

You will need
480g cake flour
240g sugar
1tsp baking soda
2 tsp baking powder
1 tsp salt
1 cup oil
2 cups milk
2 Tbsp apple cider vinegar
30g vanilla bean paste

IMPORTANT NOTE: To make a batch of cake flour if you cannot buy it, substitute 2 Tbsp of corn starch (corn flour UK) for every 1 cup of standard flour used.  The best way I found to do this was to take a cup measurement, add 2 Tbsp corn starch, and then fill the remainder of the cup with flour.  You then need to sift these ingredients together.

1. Sift cake flour, baking powder, baking soda, and salt.  Mix in sugar.

2. In a small bowl, add milk and vinegar.  Mix and let sit 1 minute.

3. Add oil to milk and vinegar and whisk.

4. Make a well in the dry ingredients and add the liquid into the center.  Stir until you have a paste and then begin whisking to remove lumps.

5. Line your cupcake trays and fill 2/3 full.

6. Bake at 175C/165C fan ovens for 15-17 minutes.


Vanilla Bean Frosting

225g unsalted butter (room temperature)
500g powdered sugar
2 tsp vanilla bean paste
2 Tbsp milk

1. With an electric mixer, cream the butter.

2. Add vanilla. 

3. Add powdered sugar (a bit at a time) and beat until smooth.

4. Add milk with care, only when adding the sugar starts to dry out the frosting.

Wednesday, 5 February 2014

Rainbow Cupcakes


The world's cheeriest cupcakes!  Perfect for summer parties, or in pastels for easter!  These cakes are easy to make, but a bit more time consuming than typical cupcakes.  To save time, and to get truer colors, I usually use a white cake mix.

You will need:
1 box white cake mix batter prepared (or 1 recipe white cake batter)
6 small bowls
Rainbow of food colourings (Red, Yellow, Blue required)
Frosting recipe below!

Yield: 20 cupcakes

1. You will need to divide the batter into six bowls.  1 bowl should have an extra 3 Tbsp of batter (this will be the red).

2. Dye each, red, orange, yellow, green, blue, purple.  Without being too patronising, if you do not wish to invest heavily in food dye, orange, green, and purple can be made from red, yellow, and blue. The higher quality the food dye is, the more vibrant your results will be.

3. Line a cupcake tray with 20 wrappers.

4. Begin layering, starting with purple at the bottom.  Use only enough of each color batter to cover the previous color to avoid running out.

5. When you get to the last layer, red, use a bit more as the dome shape of the top of the cake requires more of this color.

6. Bake as per recipe instructions.

Vanilla Buttercream Frosting

You will need:

1 cup butter (two sticks) - room temperature
4 cups powdered sugar
2 1/2 tsp clear vanilla
1/4 cup skim milk


1. With an electric mixer, cream the butter.


2. Add milk and vanilla.

3. Add powdered sugar and beat, one cup at a time, until smooth.

4. Frost cupcakes.

Friday, 24 January 2014

Shortcut Weeknight Chicken Katsu Curry


I was forced to come up with a shortcut version Chicken Katsu Curry, as we would go broke if we went to Japanese restaurants as often as we'd like.  This is so quick and perfect for a work night!

If you'd like a more authentic katsu curry, click here!

Yield: 4 portions

You will need:

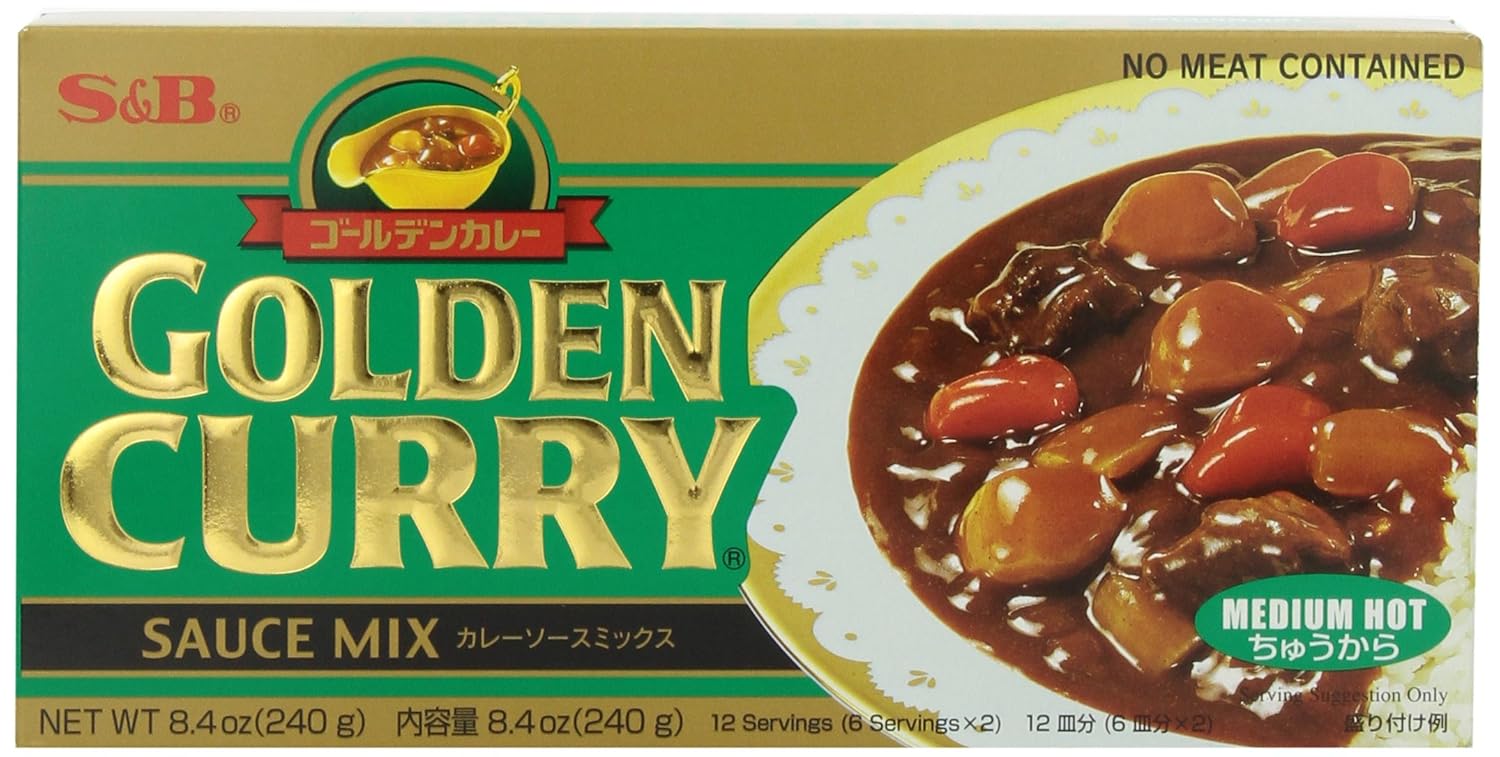
1 package of Golden Curry sauce mix
4 breaded chicken cutlets
I'd recommend rice or boiled potatoes as a side!

All you need to do is bake your chicken while preparing the sauce according to package instructions.  If you've never cooked with Golden Curry suace mix before, all you need to do is add the appropriate amount of water for how much sauce you wish to make in a saucepan, break apart the mix, heat, and stir until sauce thickens.  Done!


Tuesday, 14 January 2014

Pull-Apart Breakfast Pumpkin Bread


Happy New Year!  I present to you the perfect frozen Sunday morning or even Christmas morning treat.  I used this recipe as a guide, but had to make a few mods as I wanted it a bit more 'pumpkiny'.  Also rum is a no-go for me, so I made a really simple classic cinnamon roll glaze to go with it.

My modified ingredient list:
2 Tbsp unsalted butter
1/2 cup milk
2 1/4 teaspoons (1 envelope) active dry yeast
1 cup pumpkin puree
1/4 cup granulated sugar
1 tsp salt
2 1/2 cups bread flour
----
3/4 cup granulated sugar
2 tsp ground cinnamon
1/2 tsp fresh ground nutmeg
1/4 tsp ground cloves
2 Tbsp unsalted butter

Topping:
1/3 cup milk
1 tsp vanilla extract
3/4 cup powdered (icing) sugar

Recipe as written by Willow Bird Baking
Directions:
"Make the pull-apart bread dough: Grease and flour a loaf pan and set aside. In a saucepan over medium-high heat, brown the 2 tablespoons of butter. Let it bubble and foam and when you see it start to brown, stir it so that it browns evenly. When it’s the color of dark honey, remove it from the heat and pour it into a large heat-safe mixer bowl to cool. In the same saucepan over medium-low heat, warm the milk until it bubbles. Remove it from the heat and pour it into the bowl with the butter. Let these cool until they’re about 100-110 degrees F (use a candy thermometer to check). Set the saucepan aside for another use later. I use the same one throughout the entire recipe; why do more dishes?

Stir the sugar and yeast into the milk/butter mixture and let it sit for about 10 minutes to proof (it should foam; if it doesn’t, discard it yeast and try again with new yeast). Stir in pumpkin, salt, and 1 cup flour. If you haven’t already, fit your mixer with a dough hook. Add the rest of the flour 1/2 cup at a time, stirring between each addition. When the dough is combined, knead on low speed with a dough hook until smooth and elastic (about 4 minutes with a mixer).

Place the dough in a greased bowl and cover it with a damp cloth. Let it rise in a warm place for about an hour until it doubles in size (After it rises, you can put it in the fridge overnight to use it in the morning, but let it sit out for half an hour before rolling if you do.)

Make the filling: While the dough is rising, whisk the sugar, cinnamon, and nutmeg together in a small bowl. Toward the end of the rising time, melt the 2 tablespoons of butter for the filling in the saucepan over medium-high heat and brown it as directed above. Put it in a small heat-safe bowl to cool for use later.

Shape and bake pull-apart bread: Knead a sprinkling of flour (about 1 tablespoon) into the dough, deflating it, and recover it. Let it sit to relax for 5 minutes. Flour a large work surface and turn your rested dough out onto it. Roll it out to a 20 inch long and 12 inch wide rectangle, lifting corners periodically to make sure it’s not sticking. If it seems to be snapping back, cover it with your damp towel and let it rest for 5 minutes before continuing (I had to do this twice during the process).

Spread the browned butter over the surface of the dough with a pastry brush and then sprinkle the sugar mixture over the top, patting it down to ensure it mostly sticks. Joy the Baker encourages you to use it all even though it seems like a ton, but I admit I got squeamish at the amount and only used most. It was fine despite my nerves. Go ahead and pile it on.

With the long edge of the rectangle toward you, cut it into 6 strips (do this by cutting the rectangle in half, then cutting each half into equal thirds. I used a pizza cutter). Stack these strips on top of one another and cut the resulting stack into 6 even portions (again, cut it in half, and then cut the halves into equal thirds). Place these portions one at a time into your greased loaf pan, pressing them up against each other to fit them all in. Cover the pan with your damp cloth and place it in a warm place for 30-45 minutes to double in size.

While dough rises, preheat oven to 350 degrees F (or 325 if you have a glass loaf dish instead of a metal pan). When it’s risen, place the loaf in the center of the oven and bake for 30-35 minutes until dark golden brown on top (if you take it out at light golden brown, it’s liable to be raw in the middle, so let it get good and dark). Cool for 20-30 minutes on a cooling rack in the loaf pan while you make the glaze.

Assemble and serve: Use a butter knife to loosen all sides of the bread from the loaf pan and gently turn it out onto a plate. Place another plate on top and flip it to turn it right side up. Drizzle glaze over top. Serve each piece slightly warm with a drizzle of glaze."

Icing
To make Whimsical Cookery's icing, simply whisk together the milk, vanilla, and powdered sugar.

Thursday, 19 December 2013

Pink Peppermint Chip Meringues


My mum made these festive beauties!  Yes, another meringue recipe, but these will brighten up any Christmas cookie plate!

You will need:
4 egg whites
1/2 tsp cream of tartar
1/8 tsp salt
1/4 tsp peppermint extract
1 cup sugar
12 oz mini chocolate chips
Red food coloring (careful not to go overboard, as this will affect stiffness of meringue)

1. Preheat oven to 225F/110C.

2. In a lage bowl, beat together the egg whites, cream of tartar, salt, peppermint extract, and food colouring.

3. Slowly add the sugar, just one spoonful at a time and continue to beat the meringue until it is stiff enough to form peaks.

4. Carefully fold in the mini chocolate chips.

5. Drop meringues by heaped tablespoonfuls (meringues should be about 1.5in wide and just under an inch tall).

6. Bake about 1 hr 15 minutes, though I recommend you check earlier as browning meringues are not ideal.  These meringues can take up to an hour and a half to bake.


Saturday, 14 December 2013

Mint Christmas Tree Meringues


2 oz./approx 50g semi-sweet bakers chocolate for stars
4 eggs whites
1 cup granulated sugar
1/8 tsp cream of tartar
1/8 tsp mint extract
Green food coloring (I used 4 drops of McCormick brand)

Prepare chocolate stars FIRST by heating a small amount of chocolate, and using a small piping tip (or cut the tip of a plastic bag), pipe out a few dozen stars in chocolate onto wax paper or parchment.  These can then harden while meringues bake.

For the meringues:
1. Preheat oven to 200F/100 C.

2. In a bowl, beat egg whites and tartar until mixture begins to thicken.

3. Slowly add sugar to the mixture until meringue is able to hold stiff peaks.

4. Beat in mint extract and food coloring.  Be careful not to overdo it on the food coloring, as it will cause your lovely stiff meringue to become a gooey mess.

5. Line a baking sheet with parchment or some other non-stick surface.

6. Add mixture to a piping bag with a large cupcake decorating nozzle (see picture of meringues for idea of what type of nozzle would be best).

7. Pipe meringues wide at the base to a point, as though you were using a soft-serve ice cream machine (again, see picture).

8. Bake at 200F/100C for about 2 hours 10 minutes.  Do not open the oven door.  Simply turn off the oven and allow meringues to cool down for another half an hour in the oven.  Then remove and allow to cool.

9. Once cool, you can attach the chocolate stars by heating up any leftover chocolate from before, and dipping the tips of the trees in the warm chocolate.  Set stars on top and allow to cool again.

Saturday, 7 December 2013

Breakfast Burger


I have seen breakfast burgers in many of my favorite restaurants, and I have amalgamated them all into one super Breakfast Burger.

I will spare you a patronizing recipe, and just say that the best order to stack this burger is:
1. Pancake (bottom)
2. Maple Syrup
3. Bacon (cooked)
4. More syrup
5. Burger
6. Cheese (american)
7. Fried egg

As soon as you push the bun on top, ooey-gooey delicious egg yolk will run down the sides and combine with the cheese which works well in a classic burger kind of way.  From the bottom up, your traditional pancakes and syrup will add a strange but amazing sweetness.  And in between is the burger, pulling it all together.  Ta da!

Saturday, 30 November 2013

Basic Cheese Lasagne

No frills lasagne for those on a budget!

Egg lasagne noodles(approx 200g)
500g Spicy tomato pasta sauce
300g Shredded mozarella cheese
4 Tbsp Grated Parmesan cheese
1 cup large-curd Cottage Cheese
1 tsp Garlic powder
1 tsp Onion powder

1. Cook the noodles until tender.

2. While noodles are cooking, combine garlic powder, onion powder, cottage cheese, and parmesan in a small bowl.

3. When you are ready to assemble lasagne, simple alternate fillings with noodles in a 9in x 9in square pan.  For example, I did sauce --> noodles --> cheese mixture --> by noodles --> sauce --> mozzarella --> noodles --> cheese mixture --> noodles --> sauce --> mozarella --> etc etc REPEAT! 

4. Bake at for 30 minutes at 180C!


Sunday, 17 November 2013

Simple Corn Dog Muffins


I did not expect this to turn out as amazing as they were, therefore I did not write down my recipe.  However, if you'd like to replicate this yourself, just take a simple cornbread batter (recipe) and pour it into prepared muffin cups.
The next step is to par-cook some hotdogs in the microwave just to ensure that they finish cooking in the oven since uncooked hot dogs are a no-no.
Finally, slice them up and pop them into your cornbread muffins!  Not too difficult, and a simple recipe for if you are craving corn dogs!