Mushroom-Shaped Chocolate-Orange Meringues

Whimsical party food to impress.

Froot Loop Cupcakes (USA)

Fancy dressing up your vanilla cupcakes?

Creamy Chicken Tetrazzini

Savory and creamy comfort food!

I-Disgust-Me BBQ Burgers

A burger for when you've stopped caring about fat content. The only thing missing is bacon!

Crab-Topped Deviled Eggs

Eggcelent. Yeah, I went there.

Chicken-Fried Chicken with Country Gravy Dipping Sauce

Double-coated for extra CRUNCH.

Red-Bottom Cake

Imagine if a black-bottom cupcake had a baby with a red velvet cake. Now imagine a red-bottom cake. Simply another excuse to eat cream cheese frosting.

A Rather Traditional Pavlova

Dreaming of a sunny summer day in food format?

Orange Beef Burgers

A chinese takeaway in burger form.

Mexican-Inspired: Cheesy Refried Bean Quesadillas

I beat Taco Bell to their own crushed-Dorito food hell with these babies.

Marsala Chicken Dumplings

Dumplings get a makeover.

Mochacinno Fudge

Premium coffee drink fudge!

Parmesan Chicken Risotto

Risotto for picky eaters!

Whimsical Cookery is a site for adults who prefer to eat like children, or perhaps just need to cook for some children. This site contains an aversion to vegetables, a love of fried food and cupcakes, lazy shortcuts, some disturbing creations, and an ignorance of proper culinary practices...

Showing posts with label Christmas. Show all posts

Monday, 5 January 2015

Soy, Honey, and Brown Sugar-Glazed Roast Sweet Potatoes


This super sweet and sticky side dish makes a wonderful addition to a meal!  It is particularly good with fried foods and roasts (and would therefore be a great addition to a Thanksgiving or holiday meal). It is so hard to stop eating this all in one go!  It's also easy on your budget and goes down well with picky eaters.

You will need:
3 medium sweet potatoes
1 Tbsp soy sauce
1 Tbsp brown sugar
1/8 tsp Worcestershire sauce
Honey for drizzling
Toasted Sesame Oil for brushing on potatoes

1. Wash and peel sweet potatoes.  Cut into small cubes.

2. Arrange on a roasting tin over parchment paper.

3. Brush with toasted sesame oil and bake for 25 minutes at 200 C / 400 F.

4. While potatoes are roasting, combine soy sauce, brown sugar, and Worcestershire sauce in a small bowl.

5. After 25 minutes, brush potatoes with sauce.  (Very) lightly drizzle honey over potatoes and replace in oven for an additional 15-20 minutes.

Thursday, 25 December 2014

Merry Christmas and Happy Holidays!!


Wednesday, 17 December 2014

Eggnog Truffles


I loooveed the idea of making something with eggnog this year and finally settled on this! I toyed with the idea of making a white chocolate and eggnog ganache for the inside, however, due to white chocolate's low melting point and adding in the liquid of the eggnog I decided to go with a method sometimes used in fudge making, using marshmallow fluff! However, if you sub some of the cream in a ganache with eggnog I still feel like it might work? Nevertheless, here is my full-proof recipe below!

You will need:
1/3 cup eggnog
1 cup granulated sugar
1/4 cup butter
1/2 tsp rum flavoring, or to taste
1/2 tsp nutmeg
Pinch of cinnamon
1 1/2 cup white chocolate chips
1/2 cup marshmallow fluff
1 lb white candy coating or similar quality white chocolate
Nutmeg for garnish

Yield: approx 30 truffles

1. In a medium saucepan, whisk together eggnog and sugar. Add butter and keep on a low boil over medium heat for a couple minutes. Add in rum flavoring and marshmallow fluff, and whisk gently. Remove from heat as soon as marshmallow combines and add nutmeg and cinnamon.

2. With a wooden spoon, combine the white chocolate chips with eggnog mixture.

3. Once melted, pour onto a jelly role pan that has been lined with parchment paper. Refrigerate for a couple hours or until stiff.

4. To roll balls, cut out even sized squares of the truffle. The truffles look great at just under 1 inch in size.

5. Return balls to jelly role pan and this time freeze for an hour or until very firm.

6. Melt your white candy coating (they usually suggest 30 seconds at a time in the microwave at half power) in a small microwave safe bowl (just large enough to fit the chocolate is perfect).

7. Line another pan or cookie sheet with waxed paper, parchment paper, or non stick foil.

8. To dip, stick a toothpick into the side of the truffle you are dipping, cover in white chocolate, ensuring the whole area including the toothpick area is covered. Working quickly, set the truffle on your lined pan and use another toothpick to guide the truffle away from the embedded toothpick. Patch the hole with surrounding chocolate and quickly sprinkle nutmeg (which nicely hides any poor patch jobs!).

9. Return to fridge until solid and store covered in a cool place or refrigerate

Friday, 28 November 2014

New Christmas Tag!


I know that the header photo for this should be food related, but look how festive she is! 

Whimsical Cookery has a new Christmas tag for the holidays.  I come from a background of enthusiastic and obsessive Christmas holiday baking and cooking, however I'm sure most of these recipes would suit any holiday your family celebrates!  CLICK HERE TO CHECK IT OUT
Alternatively, it can be found in the Dessert drop down menu.

I'd like to share some recipes from holidays past... a list that will surely be added to this year!

http://whimsicalcookery.blogspot.co.uk/2013/12/mint-christmas-tree-meringues.html

http://whimsicalcookery.blogspot.co.uk/2012/12/holiday-sugar-cookies-w-egg-free-faux.html

http://whimsicalcookery.blogspot.co.uk/2012/12/mint-chocolate-snowball-cookies-egg.html

http://whimsicalcookery.blogspot.co.uk/2012/08/dark-chocolate-mint-chocolate-truffles.html

http://whimsicalcookery.blogspot.co.uk/2010/07/mochacinno-fudge.html

http://whimsicalcookery.blogspot.co.uk/2012/12/hot-orange-spice-mocha-drink.html


Tuesday, 14 January 2014

Pull-Apart Breakfast Pumpkin Bread


Happy New Year!  I present to you the perfect frozen Sunday morning or even Christmas morning treat.  I used this recipe as a guide, but had to make a few mods as I wanted it a bit more 'pumpkiny'.  Also rum is a no-go for me, so I made a really simple classic cinnamon roll glaze to go with it.

My modified ingredient list:
2 Tbsp unsalted butter
1/2 cup milk
2 1/4 teaspoons (1 envelope) active dry yeast
1 cup pumpkin puree
1/4 cup granulated sugar
1 tsp salt
2 1/2 cups bread flour
----
3/4 cup granulated sugar
2 tsp ground cinnamon
1/2 tsp fresh ground nutmeg
1/4 tsp ground cloves
2 Tbsp unsalted butter

Topping:
1/3 cup milk
1 tsp vanilla extract
3/4 cup powdered (icing) sugar

Recipe as written by Willow Bird Baking
Directions:
"Make the pull-apart bread dough: Grease and flour a loaf pan and set aside. In a saucepan over medium-high heat, brown the 2 tablespoons of butter. Let it bubble and foam and when you see it start to brown, stir it so that it browns evenly. When it’s the color of dark honey, remove it from the heat and pour it into a large heat-safe mixer bowl to cool. In the same saucepan over medium-low heat, warm the milk until it bubbles. Remove it from the heat and pour it into the bowl with the butter. Let these cool until they’re about 100-110 degrees F (use a candy thermometer to check). Set the saucepan aside for another use later. I use the same one throughout the entire recipe; why do more dishes?

Stir the sugar and yeast into the milk/butter mixture and let it sit for about 10 minutes to proof (it should foam; if it doesn’t, discard it yeast and try again with new yeast). Stir in pumpkin, salt, and 1 cup flour. If you haven’t already, fit your mixer with a dough hook. Add the rest of the flour 1/2 cup at a time, stirring between each addition. When the dough is combined, knead on low speed with a dough hook until smooth and elastic (about 4 minutes with a mixer).

Place the dough in a greased bowl and cover it with a damp cloth. Let it rise in a warm place for about an hour until it doubles in size (After it rises, you can put it in the fridge overnight to use it in the morning, but let it sit out for half an hour before rolling if you do.)

Make the filling: While the dough is rising, whisk the sugar, cinnamon, and nutmeg together in a small bowl. Toward the end of the rising time, melt the 2 tablespoons of butter for the filling in the saucepan over medium-high heat and brown it as directed above. Put it in a small heat-safe bowl to cool for use later.

Shape and bake pull-apart bread: Knead a sprinkling of flour (about 1 tablespoon) into the dough, deflating it, and recover it. Let it sit to relax for 5 minutes. Flour a large work surface and turn your rested dough out onto it. Roll it out to a 20 inch long and 12 inch wide rectangle, lifting corners periodically to make sure it’s not sticking. If it seems to be snapping back, cover it with your damp towel and let it rest for 5 minutes before continuing (I had to do this twice during the process).

Spread the browned butter over the surface of the dough with a pastry brush and then sprinkle the sugar mixture over the top, patting it down to ensure it mostly sticks. Joy the Baker encourages you to use it all even though it seems like a ton, but I admit I got squeamish at the amount and only used most. It was fine despite my nerves. Go ahead and pile it on.

With the long edge of the rectangle toward you, cut it into 6 strips (do this by cutting the rectangle in half, then cutting each half into equal thirds. I used a pizza cutter). Stack these strips on top of one another and cut the resulting stack into 6 even portions (again, cut it in half, and then cut the halves into equal thirds). Place these portions one at a time into your greased loaf pan, pressing them up against each other to fit them all in. Cover the pan with your damp cloth and place it in a warm place for 30-45 minutes to double in size.

While dough rises, preheat oven to 350 degrees F (or 325 if you have a glass loaf dish instead of a metal pan). When it’s risen, place the loaf in the center of the oven and bake for 30-35 minutes until dark golden brown on top (if you take it out at light golden brown, it’s liable to be raw in the middle, so let it get good and dark). Cool for 20-30 minutes on a cooling rack in the loaf pan while you make the glaze.

Assemble and serve: Use a butter knife to loosen all sides of the bread from the loaf pan and gently turn it out onto a plate. Place another plate on top and flip it to turn it right side up. Drizzle glaze over top. Serve each piece slightly warm with a drizzle of glaze."

Icing
To make Whimsical Cookery's icing, simply whisk together the milk, vanilla, and powdered sugar.

Thursday, 19 December 2013

Pink Peppermint Chip Meringues


My mum made these festive beauties!  Yes, another meringue recipe, but these will brighten up any Christmas cookie plate!

You will need:
4 egg whites
1/2 tsp cream of tartar
1/8 tsp salt
1/4 tsp peppermint extract
1 cup sugar
12 oz mini chocolate chips
Red food coloring (careful not to go overboard, as this will affect stiffness of meringue)

1. Preheat oven to 225F/110C.

2. In a lage bowl, beat together the egg whites, cream of tartar, salt, peppermint extract, and food colouring.

3. Slowly add the sugar, just one spoonful at a time and continue to beat the meringue until it is stiff enough to form peaks.

4. Carefully fold in the mini chocolate chips.

5. Drop meringues by heaped tablespoonfuls (meringues should be about 1.5in wide and just under an inch tall).

6. Bake about 1 hr 15 minutes, though I recommend you check earlier as browning meringues are not ideal.  These meringues can take up to an hour and a half to bake.


Saturday, 14 December 2013

Mint Christmas Tree Meringues


2 oz./approx 50g semi-sweet bakers chocolate for stars
4 eggs whites
1 cup granulated sugar
1/8 tsp cream of tartar
1/8 tsp mint extract
Green food coloring (I used 4 drops of McCormick brand)

Prepare chocolate stars FIRST by heating a small amount of chocolate, and using a small piping tip (or cut the tip of a plastic bag), pipe out a few dozen stars in chocolate onto wax paper or parchment.  These can then harden while meringues bake.

For the meringues:
1. Preheat oven to 200F/100 C.

2. In a bowl, beat egg whites and tartar until mixture begins to thicken.

3. Slowly add sugar to the mixture until meringue is able to hold stiff peaks.

4. Beat in mint extract and food coloring.  Be careful not to overdo it on the food coloring, as it will cause your lovely stiff meringue to become a gooey mess.

5. Line a baking sheet with parchment or some other non-stick surface.

6. Add mixture to a piping bag with a large cupcake decorating nozzle (see picture of meringues for idea of what type of nozzle would be best).

7. Pipe meringues wide at the base to a point, as though you were using a soft-serve ice cream machine (again, see picture).

8. Bake at 200F/100C for about 2 hours 10 minutes.  Do not open the oven door.  Simply turn off the oven and allow meringues to cool down for another half an hour in the oven.  Then remove and allow to cool.

9. Once cool, you can attach the chocolate stars by heating up any leftover chocolate from before, and dipping the tips of the trees in the warm chocolate.  Set stars on top and allow to cool again.

Tuesday, 18 June 2013

Raspberry Cream Whoopie Pies


Another multipurpose recipe!  Perfect for an english tea time or a Christmas cookie tray dusted with powdered sugar snow.  This recipe is a slightly tweaked version of Better Homes and Garden's Mini Raspberry and White Chocolate Whoopie Pies.  You can see their original recipe here.

For Vanilla Whoopie Pies you will need:
1/2 cup butter (room temperature)
1 cup sugar
Pinch of salt
3/4 tsp baking soda
1 large egg
1 1/2 tsp vanilla extract
2 cups flour
1/2 cup buttermilk

1. Preheat oven to 375 F/190 C.

2. In a large bowl, cream butter.

3. Add sugar, salt, and baking soda and mix.

4. Add egg and vanilla. Mix.

5. Add in flour and buttermilk (alternating between the two).

6. Drop dough in heaping teaspoonfuls onto a parchment-covered (or some other VERY non-stick surface)  baking tray.

7. Bake for 7 to 9 minutes at 375 F/190 C.  Allow to sit for five minutes before transferring to a cooling rack.

For the Raspberry Cream filling, you will need:
1 small jar of raspberry preserves (seeds/bits-free)
1/4 cup whipping cream
85g/3oz white bakers chocolate
1/2 cup marscapone cheese
5 Tbsp butter (room temperature)
1/4 tsp vanilla
3-4 cups powdered sugar

1. Melt bakers chocolate in a double boiler (or glass bowl over water on a low-boil).  Stir in whipping cream.

2. Allow to cool down, stirring occasionally to check consistency.

3. In a bowl, cream butter and marscapone.

4. Beat in vanilla.

5. Slowly mix in powdered sugar and white chocolate mixture (alternating between the two) once it is room-temperature.  

6. Place mixture in a large piping bag.  Tie off the end with a twist tie to prevent a mess, and chill in the fridge for 15-30 minutes until stiffened.  If over-chilled, simply leave out again until you are able to pipe.

7. In the mean time, spread raspberry preserve on half of the whoopie pie pieces.

8. Once chilled, pipe the creamy mixture onto the remaining whoopie pie halves.

9. Sandwich gently together with the raspberry preserve pieces.

10. Dust with powdered sugar if desired.


Saturday, 22 December 2012

Holiday Sugar Cookies w/ Egg-Free (faux) Royal Icing


I adore spending far too long decorating each individual cookie.  Luckily, this year I had some help from my mom!  The beautiful boot and left Christmas tree are her handiwork.

Here is my simple recipe for sugar cookies and frosting, so you can spend less time baking and more time decorating!

You will need:
2 1/2 cups flour
1 1/8 tsp baking powder
1/2 tsp salt
1 cup sugar
3/4 cup (solid stick) margarine or 3/4 cup butter
2 eggs
1/4 teaspoon vanilla

1. Cream margarine and sugar until completely combined.

2. Add eggs and vanilla to mixture and combine.

3. In a separate bowl, combine flour, baking powder, and salt.

4. Slowly add and mix dry ingredients to the wet mixture.

5. Refrigerate for 1-2 hours or until stiff.

6. Roll out dough on a lightly floured surface.  About 1/4 inch thick (or slightly thicker, your preference).

7. Bake at 400F/200C (or at a slightly lower temperature in a fan assisted/convection oven).  I'm adding this note, as sugar cookies burn easily, in my opinion.

8. Bake for 8-10 minutes.  Less for smaller/thinner cookies.  

9. Allow to cool before frosting!


Egg-Free (Faux) Royal Icing Recipe:

3 cups icing sugar/powdered sugar
1/4 cup milk
2-3 Tbsp light corn syrup (add more if too dry)
1 tsp clear vanilla extract
Assorted food dyes and sprinkles/toppings for decoration

1. Combine all ingredients by whisking gently.
2. Separate frosting into separate bowls to create different colors (by adding food dye).  The higher quality food dye you have, the more brilliant your colors will be.  I have been burned by store brand food dye before.
3.  Add frosting to piping bags with thin tips or plastic bags with a corner cut off (be sure not to cut too large of a hole o you will have a mess).


Note: To get the whimsical pulled-colors look to your frosting, simply flood your cookie with frosting and pipe lines of contrasting frosting over.  Then drag a toothpick in the direction you want your frosting to be pulled.

Friday, 21 December 2012

Hot Orange Spice Mocha Drink


Hot Orange Spice Mocha drinks are a nice way to keep warm when the temperatures are below freezing!  Last night it was snowing so hard and so beautifully, it looked like a snow globe outside.  What choice did I have but to make some sort of seasonal hot drink?  This recipe is quite easy to make, though cleanup is a bit of hassle if you do not have a dish washer.

You will need:
2 cups water
2 cups milk
1 orange
1/2 tsp whole cloves
1 stick of cinnamon
1/2 cup hot chocolate mix
1-2 Tbsp instant coffee granules (to taste)

1. In a saucepan, combine water, milk, cloves, cinnamon stick, hot chocolate mix, and coffee granules.

2. Grate the zest of 1 orange into the pan and then squeeze the juice from the orange into the mixture.

3. Bring to a gentle boil for 5-8 minutes and stir constantly on a low heat to prevent scorching.

4. Serve by pouring drink through a sieve.

5. Remove any milk skin that forms as it cools, as I would imagine most people don't enjoy drinking globby milk.

IMPORTANT NOTE: If you have cheesecloth, you may find it easier to put the cinnamon stick, cloves, and orange zest in the cheese cloth and make a little baggy out of it for easy removal (instead of serving it through a sieve).

Tuesday, 18 December 2012

Mint Chocolate Snowball Cookies (Egg-free and Original Nestle recipe)


This is officially my favorite cookie recipe of all time.  And I am in no way exaggerating.  My mom and I have made these cookies every year since I was very very young, I can't actually remember when we first started making them.  I was just that young.  Each year we have to make a double or even triple batch, as everyone snaps them up so greedily! 

This year, in addition to making the original recipe with my mom while on vacation in America, I perfected an egg-free recipe about 2 weeks ago while still in the UK so that I could share them with my boyfriend's family.  I also omitted the vanilla extract from the recipe, as it contains a tiny amount of alcohol.  However, there is the option of leaving it in if you prefer, OR substituting the extract for real vanilla.  Since vanilla pods are so expensive, that option was not an option for me.  For the record, the cookies are nearly identical in taste and texture as the original recipe.

Egg-Free Mint Chocolate Chip Snowball Cookies

You will need:

2.5 cups flour
3 1/2 tsp baking powder
1/2 tsp salt
1 1/4 cups granulated sugar, divided
3/4 cup vegetable oil
1/4 cup milk (add an additional 1 Tbsp milk at a time before Step 8 if necessary until dough is not crumbly  
      and is able to hold a sphere/ball shape)
1 tsp vanilla extract (optional)
1 10oz package Mint Chocolate Chips

1. Preheat oven to 350 F.

2. In small bowl, combine flour, baking powder, and salt.  Set aside.

3. In a large bowl, combine 1 cup sugar and vegetale oil.  Mix.

4. Beat in milk and (optional) vanilla extract.

5. Gradually add flour mixture.

6. Stir in mint chocolate chips.

7. Drop by rounded teaspoonfuls onto ungreased cookie sheets.

8. Roll drops into balls and roll balls in a small bowl of remaining sugar.

9. Place sugar-covered dough balls back on the cookie sheets and bake for 8-10 minutes.

Yield 5 1/2 dozen (small) cookies


Nestle's Toll House Chocolate Mint Sugar Cookie Drops (Original Recipe)

You will need:
2.5 cups flour
1 1/2 tsp baking powder
3/4 tsp salt
1 1/4 cups granulated sugar, divided
3/4 cup vegetable oil
2 eggs
1 tsp vanilla extract
1 10oz package Mint Chocolate Chips

1. Preheat oven to 350 F.

2. In small bowl, combine flour, baking powder, and salt.  Set aside.

3. In a large bowl, combine 1 cup sugar and vegetale oil.  Mix.

4. Beat in eggs and vanilla extract.

5. Gradually add flour mixture.

6. Stir in mint chocolate chips.

7. Drop by rounded teaspoonfuls onto ungreased cookie sheets.

8. Roll drops into balls and roll balls in a small bowl of remaining sugar.

9. Bake 8-10 minutes.

Yield 5 1/2 dozen (small) cookies

Thursday, 22 November 2012

Mini Oreo Cheesecakes


I threw this recipe together SO quickly for a (Christmas) family get-together a while ago.  These are quite quick to make and use easily found ingredients.  They taste amazing, making it hard to just eat one even though you know that amount of cheesecake cannot be good for you!

You will need:
18 cupcake wrappers
18 oreos (peanut butter, mint, double stuffed, chocolate any flavor is amazing)
+6 oreos for crushing (24 total oreos)
16 oz. (approx 450g) of cream cheese at room temperature
1/2 cup sour cream
1/3 cup granulated sugar
1 tsp vanilla
2 eggs


1. Line cupcake tray and place 1 oreo at the bottom of each.

2. Place 6 oreos in a food processor and crush (or do so by hand in a large plastic bag).

3. Beat room-temperature cream cheese until smooth.

4. Beat in sugar, vanilla, and eggs.


5. Fold in oreo crumbs.

6. Divide mixture amongst the 18 holders.

7. Bake at 300°F (150°C) for 18-22 minutes.

8. Chill cheesecakes before serving.

Friday, 17 August 2012

Mint Dark Chocolate Truffles


I made truffles as a birthday gift last week for the lovely Renu.  These truffles would also make an excellent addition to a holiday party. They turned out really well, but the leftovers took a bit of a dodgy turn in the fridge a few days later.  However, this is my own fault for putting them in the fridge and allowing them to soak up fridge flavors, including (but not limited to) leftover birthday Pizza Hut!  I would advise against this. 
Here's my recipe for dark chocolate mint truffles....

Basic truffle recipe:
12 oz (335g) dark chocolate
1/3 cup heavy whipping cream
2 tsp peppermint extract
---
12 oz (335g) chocolate(s) of choice
Food coloring if desired

1. Place a glass bowl over a pot of boiling water.

2. Add dark chocolate to the bowl, and melt.  Add peppermint extract as you stir.

3. Once melted, add the cream and stir until glossy.

4. Refrigerate until cooled.

5. Scoop out rounded balls of desired size (or use your hands to shape into balls) OR press truffle mix into chocolate molds (silicon ice cube trays in fun shapes work as well).

6. Allow to re-harden in fridge.

7. For the coating I melted an additional 12 oz (335g) worth of chocolate and white chocolate.  Some of this was a green-tinted white chocolate for decoration.  If you wish to add coloring, I recommend doing so before you heat the chocolate fully, as the chocolate may (or may not) seize up. If you are an amateur like me and do have problems with your chocolate seizing every now and then, as a cheat I would recommend adding a bit of vegetable oil to bring it back to the desired texture.

8. Allow to cool at room temperature.


Sunday, 16 January 2011

Chocolate Cheesecake Bars


Easy creamy cheesecake bars without the fuss of being a proper cheesecake.  These were snatched up before I had even finished cutting them! 

You will need:
1 box chocolate teddy grahams (or chocolate cookies)
1/2 cup butter (melted)
1/2 cup flour
3/4 cup sugar
24 oz full-fat cream cheese
3 eggs
1/2 tsp vanilla extract
1/3 cup sour cream
6-12 oz semi-sweet chocolate chips (12 if drizzling chocolate over top)

1. Place teddy grahams in sturdy plastic bag and crush to crumbs.

2. In a bowl, cream together cream cheese.  Mix in eggs, vanilla, and sour cream. 

3. Fold in 6 oz. chocolate chips.

4. Pour mixture over chocolate crust.

5. Bake for 12 to 15 minutes at 350º.

6. If desired, melt 6 oz chocolate chips in microwave until liquid, stirring occasionally.  Drizzle over cheesecake bars. Warning: bars are difficult to cut cleanly with the drizzled chocolate.  REFRIGERATE!

Get someone to do the leg work for ya ;)

Friday, 17 December 2010

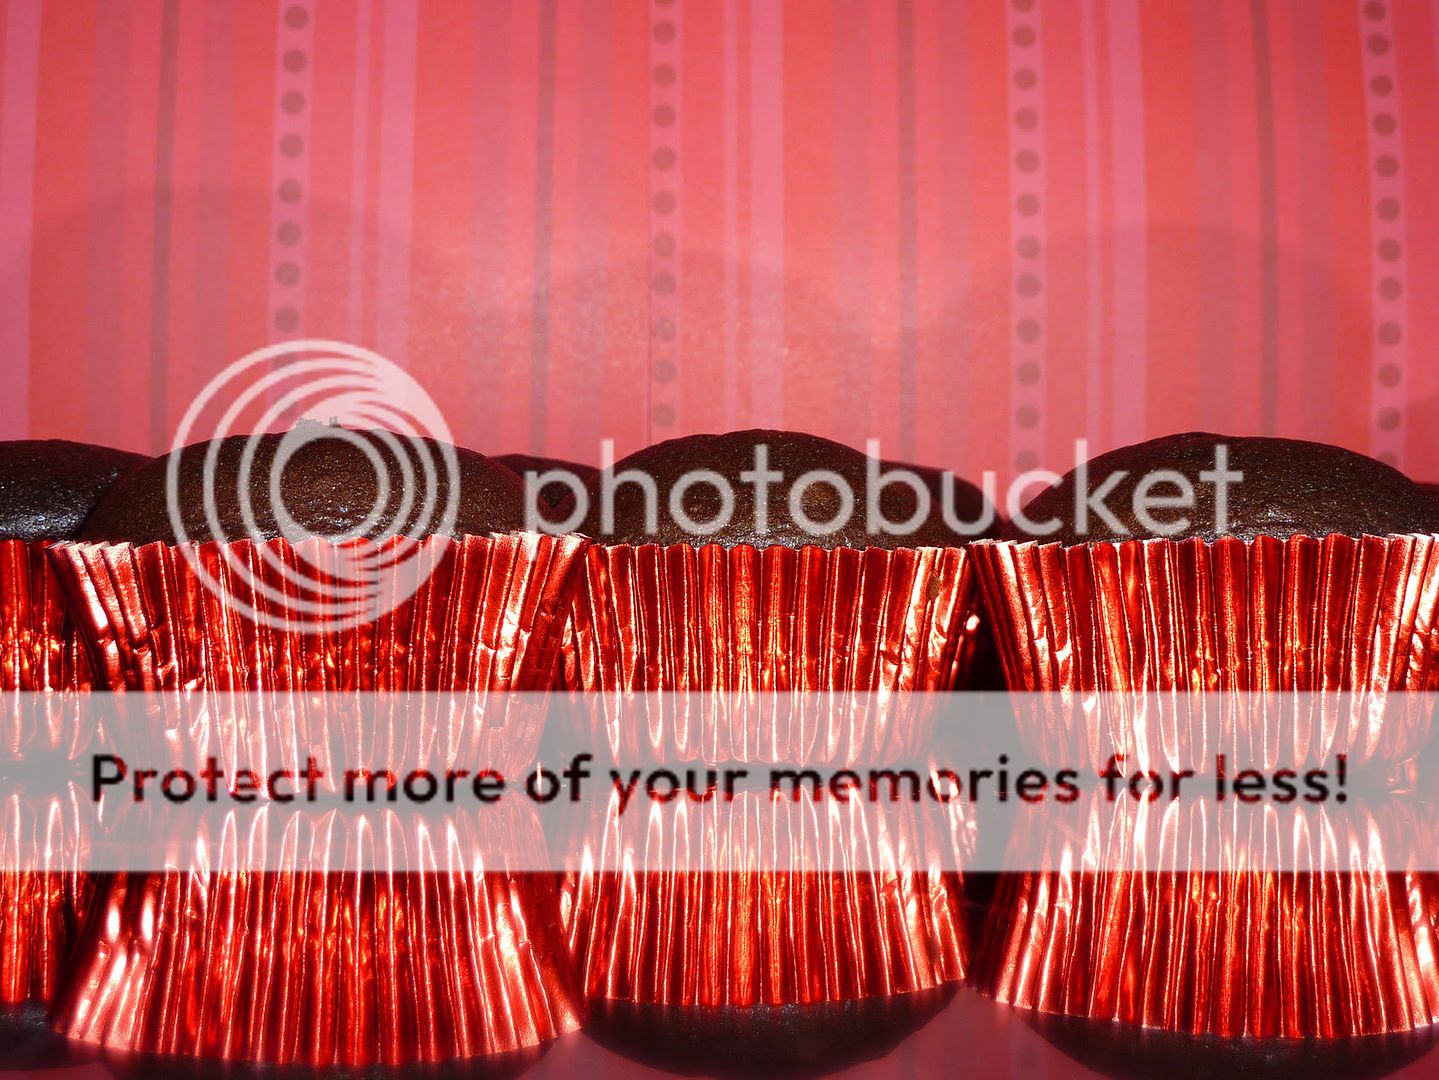
Dark Chocolate Cupcakes w/ Peppermint Frosting AKA Ajay's Delight


So one of my British BFFs has come to visit me in America over the holidays.  The boy loves him some mint chocolate.  Hence, Ajay's Delight.  A dark chocolate cupcake with peppermint frosting, garnished with a holiday sprinkling of candy cane dust.  Yummers.

Edit: Just adding desserts to the Christmas tag when I noticed this should be updated.  Ajay is not my bff, he is now my husband!  And he still loves these cupcakes, for the record.  

You will need: 
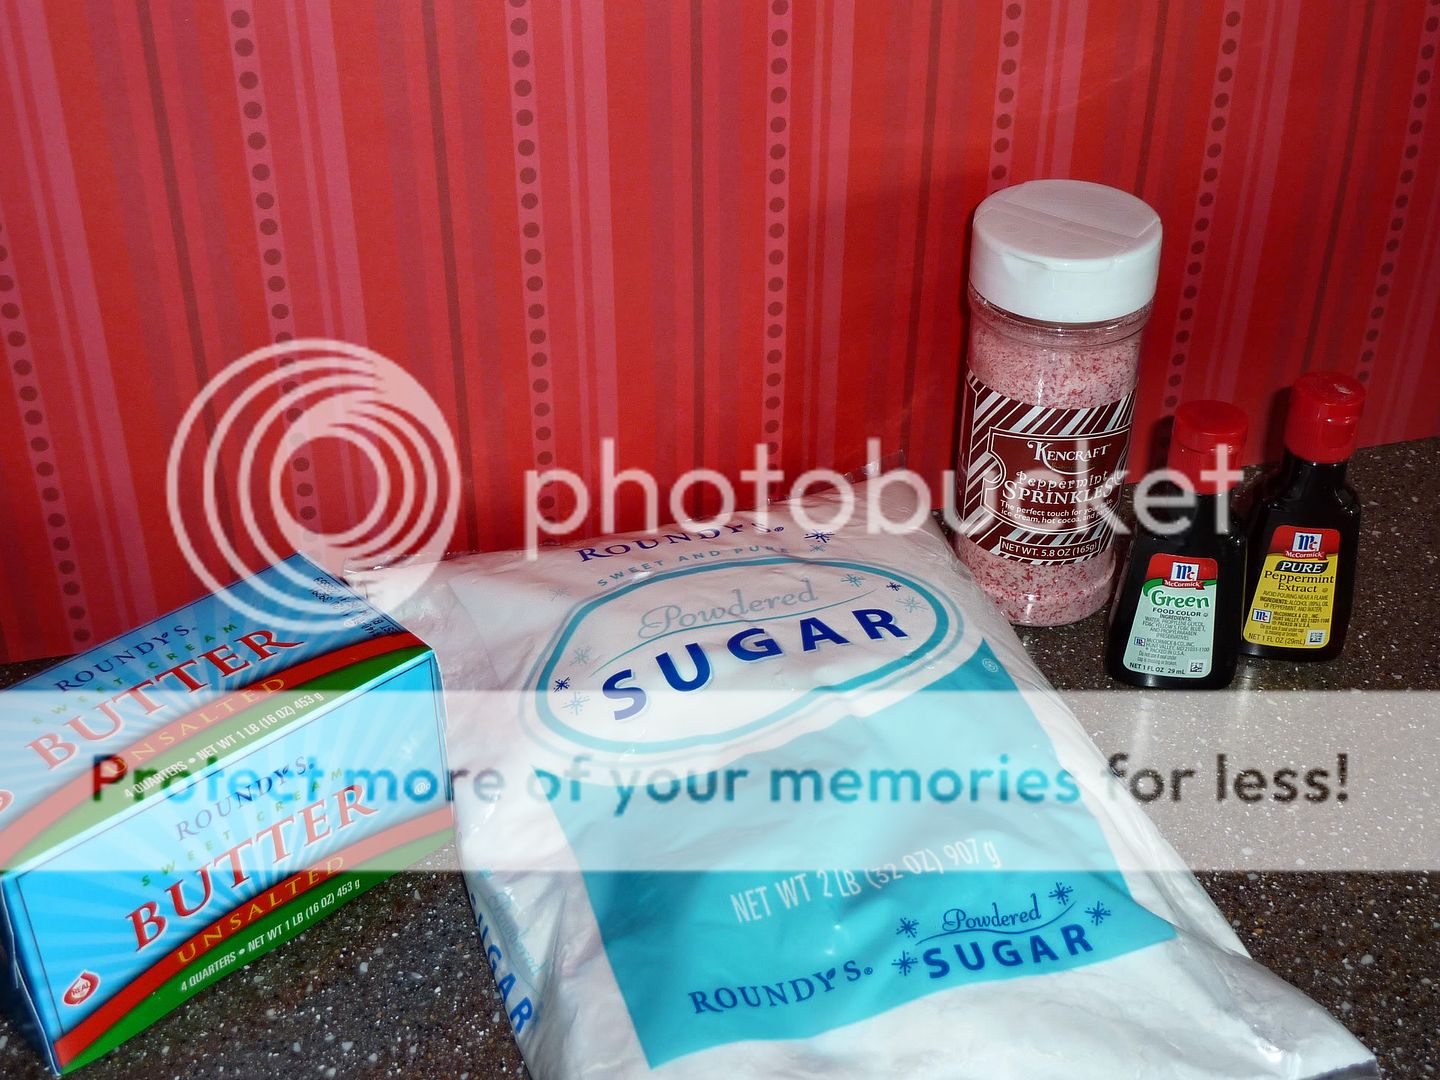
1 recipe dark chocolate cake batter yielding 24 cupcakes, prepared and baked.


Mint Buttercream Frosting
1 cup butter (two sticks) - room temperature
4 cups powdered sugar
1/4 cup skim milk
1/2 tsp peppermint extract (or to taste)


1. With an electric mixer, cream the butter.

2. Add milk and peppermint extract.

3. Add powdered sugar and beat, one cup at a time, until smooth.

Sunday, 7 November 2010

Cran-Apple Cider Sorbet


A nice sorbet in autumn or winter?  While this sorbet may be refreshing on a summer's day, it also has the sweet and spicy cider taste of holidays.  I am also currently toying with the idea of some sort of chai tea sorbet... but I digress.

You will need:
1/2 can apple juice concentrate
1/2 can cranberry juice concentrate
2 cups water
1 1/2 cups applesauce
2 Tbsp lemon juice
3 cinnamon sticks
1 tsp whole cloves


1. Combine apple juice, cranberry juice, lemon juice, and water in a pot.

2. Heat, and add cinnamon sticks and cloves.  Simmer on a low heat until desired level of spice-flavor is achieved.

3. Strain out cloves and cinnamon sticks.


4. Add applesauce and allow to cool.

5. In a freezer-safe mixing bowl, freeze sorbet mixture until it becomes a stiff-slushy consistency.

6. Remove and beat sorbet to break up the ice crystals.

7. Refreeze, remove and beat again just before frozen to refine ice crystals once again.

8. Freeze again.  To serve, let sorbet sit at room temperature for a few minutes.  Enjoy!

NOTE: Alternatively, add sieved mixture to an ice cream maker and finish in the freezer.

Friday, 15 October 2010

Easy Mint Meringues


You will need:
4 egg whites
4 drops of lemon juice
Pinch of salt
1 tsp mint extract
1 1/2 granulated sugar

1. In a large bowl, beat egg whites with an electric mixer until white and frothy.

2. Add 4 drops of lemon juice, salt, and mint extract.  Slowly add the sugar while beating.

3. Beat mixture until it is able to hold stiff peaks and does not slide out of the bowl if held at an angle or upside-down.  This may take a while, but is very important.  After mixture has thickened is a good time to preheat the oven to 225 °F (about 110 °C)


4. Add mixture to a large pastry bag (or strong plastic bag with a corner cut off to act as a pastry bag).

5. Pipe out in a spiral (see top photo).

6. Bake for 1 1/2 hours at 225 °F. Leave the meringues in the oven for another hour without the heat on. Do not open the oven until after this hour.

Wednesday, 25 August 2010

'lil Cheesecakes


This recipe was taken from my high school 'Family and Consumer Economics' cookbook.  I'm not even kidding, though I have modified it ever-so-slightly.  I can't tell you how many times I have gone back to this simple cookbook.  One of these recipes was for mini cheesecakes made in the most simplistic way possible.  This is idiot-proof cheesecake.

You will need:
18 cupcake wrappers
18 vanilla wafers (or substitute crushed graham crackers or digestive biscuits mixed w/ butter).
16 oz. of cream cheese at room temperature
2/3 cup granulated sugar
1 tsp vanilla
2 eggs
--
1/2 cup semi-sweet chocolate chips
1 Tbsp vegetable oil

1. Line cupcake tray and place 1 vanilla wafer at the bottom of each.  If you cannot find vanilla wafers, you can substitute crushed digestive biscuits or graham crackers mixed with butter or margarine.  Press this into the bottom of each cupcake holder.

2. Beat room-temperature cream cheese until smooth.

3. Beat in sugar, vanilla, and eggs.

4. Divide mixture amongst the 18 holders.

5. Bake at 350°F (180°C) for 15-20 minutes.

6. Melt chocolate chips and mix in 1 Tbsp oil. Drizzle over cheesecakes.

7. Chill cheesecakes before serving.

Thursday, 5 August 2010

Dark Chocolate Espresso Cookies with Cream Cheese Buttons


Dark Chocolate and Cream Cheese Button Cookies are so incredibly intense in rich-chocolate-coffee flavor, made moist and chewy by a topping of sweetened cream cheese.  This recipe is a spinoff from this recipe from Better Homes and Gardens "New Cookbook"

Their recipe calls for:
1/3 cup butter or margarine
1 cup packed brown sugar
2/3 cup unsweetened cocoa powder (Hershey's Special Dark is THE BEST)
1 Tbsp instant coffee granules
1 tsp baking soda
1 tsp cinnamon
2 egg whites
1/3 cup low-fat vanilla yogurt
1 1/2 cups all purpose flour
1/4 cup granulated sugar
---
4 oz. cream cheese
1/2 Tbsp milk
1/2 cup granulated sugar


Bake at 350 °F (approx 175 °C)

1. Beat butter or margarine for 30 secs.

2. Add brown sugar, cocoa, coffee, baking soda, and cinnamon and beat until combined.

3. Beat in egg whites and yogurt until combined.

4. Beat in flour.  If mixer stalls, finish mixing by hand, as dough becomes quite stiff.  It will take on the appearance of dark, yet yummy, tar. Place dough in the fridge.

5. In a clean bowl, cream milk and cream cheese together. Beat in 1/2 cup sugar. Set aside.

6. Roll cookie dough by the tablespoonful into tiny balls, then roll dough in a small bowl of granulated sugar.

6. Using a teaspoon measurement, press it into the center of each cookie to create a dip (see picture).

7. Fill the centers with the cream cheese mixture, being sure not to overfill.

8. Bake at 350 °F for 10-12 min, 2 inches apart on a greased cookie sheet.

Friday, 30 July 2010

Cinnamon-Ginger Breakfast Clovers


These clovers split into tiny delectable breakfast bites!  Flavored with ginger, cinnamon, and nutmeg, these bites are full of spice... but are not too spicy!  Perfect for a holiday morning!

You will need:
1/3 cup sour cream
1/3 cup shortening
2 tsp baking powder
1 1/2 cups flour
1 egg
1/2 cup granulated sugar
1/4 tsp salt
1/8 tsp ginger
1/4 tsp nutmeg
1/2 cup milk

---
4 Tbsp butter or margarine (approx.), melted in small bowl
Small bowl of cinnamon and sugar mix (about 1 tsp cinnamon and 1/2 cup sugar)


1. Heat oven to 350°F and grease muffin tins (yields about 16).

2. Combine sugar, egg, and shortening.

3. Add milk and stir.

4. In separate bowl, combine flour, baking powder, salt, ginger, nutmeg.

5. Gradually stir dry ingredients into 1st bowl, do not over-stir.

6. Using a rounded teaspoon for measurement, create doughballs.

7. Place three doughballs in eat muffin tin to form a clover shape (see photo below).

8. Bake for 14-16 minutes.   (Melt butter in the mean time).

9. Using a basting brush, paint each clover with melted butter or margerine.

10. Immediately cover in cinnamon-sugar mixture.